Do you want to give your garden a new lease of life but those purse strings are tied just a little too tightly?
Not to worry, transforming the look of your garden doesn’t have to be expensive, in fact it can be extremely cheap if you have a few of the right things lying around. I’m talking about garden trellises, and in this article we will give you a whole selection of ideas that you can choose from and none of them require you to spend much money in order to make them a reality.
A lot of these trellis ideas and designs won’t require you to have any special tools, materials, or even to have a ton of DIY experience or skill, so read on below and find out how you can make a garden trellis of your very own.
Benefits of making a garden trellis
Garden trellises are ideal for gardeners who don’t have a lot of space to work with. Some vine based crops, like certain types of cucumbers, can be grown on a trellis and this makes it much easier to control how they spread around your garden.
Growing crops like these, in this way, can also promote better health in the plants due to the better circulation, and increased sunlight, that occurs when they’re growing on a trellis when compared to growing on the ground.
Then of course there are the aesthetic benefits of making a garden trellis and putting it up in your garden. You can even install a few of them and have different coloured plants and flowers grow on the trellis, creating a wonderful effect in your garden.
If you have a larger garden, strategically placed trellises can create the sense of passing from one area to another and really give your favourite outside room some distinct character.
With so many benefits to making a garden trellis, don’t you think it’s time you got cracking with your own? Here a few ideas…
How to build a garden trellis- ideas and designs
The only real limit to your garden trellis designs and ideas is your imagination and creativity, but to help you along we’ve put in a guide on how to build a basic trellis, and then highlighted some further ideas for you below. Enjoy.

Building a garden trellis
To build this garden trellis you will need:
- 8-foot-Long strips of cedar wood (1×2 size)
- A can of wood stain or paint
- Screws (1 ¼” will do just fine)
- Tape measure
- Chalk
- Gravel
- Combi-drill or just a screwdriver
- Shovel
- Posthole digger
- Handsaw
- Pencil and paper
Once you’ve gathered your tools and supplies, we can get cracking. There isn’t a great deal to making a garden trellis, but you do need to have an idea about where you are going design-wise, so grab your sketchpad or a bit of scrap paper and sketch out the design that you want, and work out the overall dimensions (height and width).
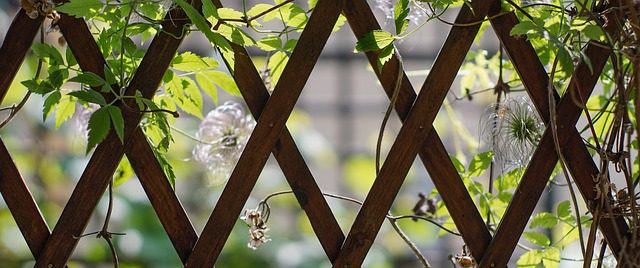
The most basic, and therefore easiest type to make, is a simple cross-pattern trellis, which we will be describing here. However, it doesn’t take much more DIY skill to change this design to a criss cross trellis, so feel free to try.
After you’ve thought it through and have an idea of what you want, it’s time to grab your tape measure, pencil, and saw and cut the cedar strips to your measurements. For ours, we cut 2 pieces at 6ft for the outer sides of the frame, and a third slightly shorter one that will run down the centre of our trellis from top to bottom. This is purely for the look, so feel free to make them all the same size.
Next, place one of your newly cut pieces of cedar on the path and use it as a ruler to draw a straight line with the chalk.
After this, use your tape measure and make a small chalk mark next to this line 6 inches away from the top of the line. Do the same at the other end of the line. You will now have two marks that you can use, along with the piece of cedar, to chalk another line that runs parallel to the first one. Repeat this process again so that you have three long lines on the ground.
If you want to make a larger garden trellis, you might want to have more than three lines, and that’s perfectly fine, but for the sake of this article we are keeping things very simple.
Now, it’s time to complete the guide grid that you are drawing on the ground. Take your tape measure and again measure out 6 inches along the outer lines and make a mark. Repeat this all the way down the lines and then use the cedar pieces like a ruler as before. If you’ve done this properly, you’ll now have a nice, straight grid composed of squares measuring 6 inches.
This grid can now be used to create whatever design you like and is a great point of reference.
To follow our design, lay the three long pieces of timber down next to the original three lines, then use a tape measure to check what lengths you want to cross bars to be and cut yourself 9 pieces at that size.
Making sure that you leave enough room at the bottom for the trellis to be secured into the ground (or not if you will be fixing to a wall), place three of the smaller cross pieces of cedar 6 inches apart, using the lines as a guide. Then, leave a gap of a few squares and do the same again. Finally repeat the process until you have three sections of three cross pieces laid out on your longer cedar pieces.
All that’s left to do now, is to screw the timber together, wherever the pieces intersect with one another, and then either paint or stain the wood. Congratulations! The construction of your garden trellis is now complete.
To install your garden trellis, simply use the posthole digger to make holes of around a foot deep and then slip a few inches of gravel into the bottom of them. Place the bottom of the trellis poles into the holes and then fill with soil, making sure to compact it every couple of inches or you’ll end up with a wobbly trellis.

And that’s all there is to it. Time to choose what to grow on your trellis and get gardening. Will you go with roses? Cucumbers? Tomatoes? Morning glory? The choice is yours.
Other garden trellis design ideas

- If you have some long branches lying around, you can place them together like the frame of a native American teepee, bind the tops together, and then use smaller branches for the cross sections.
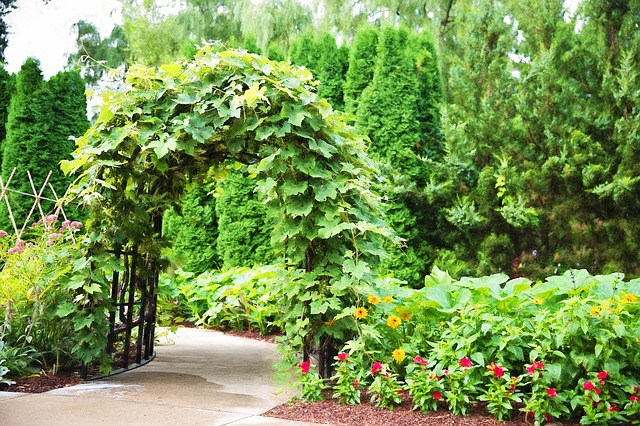
Alternatively, you could bend and shape the branches into an archway if the branches are flexible enough. You might need to put up some extra support for this type of structure though or the weight of the plants might affect it badly. - Flexible PVC pipes can also be used to make a great arched garden trellis. Simply get two long pieces and then bend them into an arch shape, secure them into the ground parallel to each other as far apart as you like and then use netting, mesh, or something else entirely, to connect them together.
- An old wooden pallet can be easily turned into a wonderful garden trellis by using a crowbar to break off the planks and then following our grid idea, creating whatever shape you like. Angling the long outer pieces in slightly can create a lovely pagoda or obelisk shaped trellis. You could even make your trellis look like a replica of the Eifel tower without too much alteration.
You’ll need to make the four sides separately and then connect them together but it’s an easy job, and having the four sides means plenty more space to grow things. - A planter/trellis combination can look great and doesn’t take much to construct. Just make a simple box for the planter, make a chalk grid on the floor to the size you intend to use for the trellis, and follow our instructions again.
Finally you just need to fix the trellis onto the back of the planter box. Simple, but effective. - Instead of having your cross pieces go straight across to make a grid, you could have them so they make a zig-zag pattern, giving your trellis a more modern feel.
- A simple A-frame covered with wire mesh can also be used as a trellis. It probably won’t be the best looking one you’ve ever seen, but if you’re just making a trellis for growing crops, it’s a very simple solution.
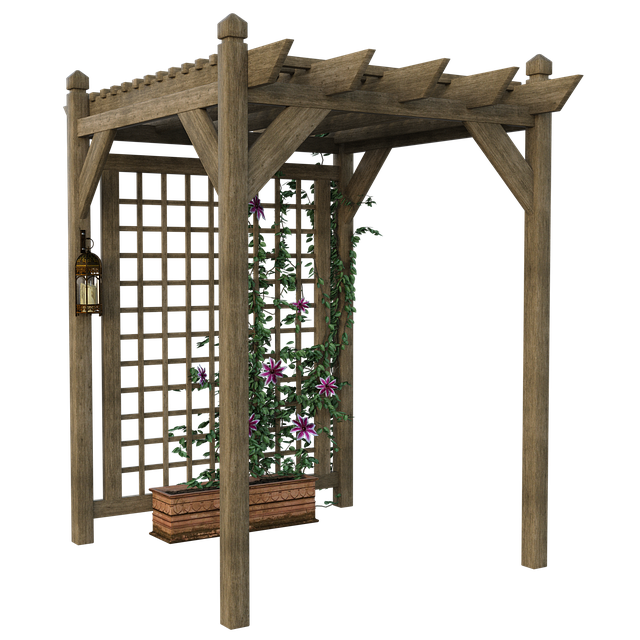
A frame can be made out of any material, just like any other garden trellis, so don’t feel like you’re tied to wood. Plastic, metal, and just about anything else can be used to create a trellis with a little bit of imagination. - You can create your arbor by following our instructions to build two identical trellises (I would make them higher than the 6 feet we used in our example), then all you need to do is create a roof section and screw it all together. The roof part can be as simple as a plank or board, but you could get creative and do whatever design you like.
If you have the confidence, you can even put some hinges on the inside of the arbor and fit a little gate in there, but if you are going to do this, use thicker wooden beams for the outer frame pieces of your trellis to support the weight of the gate. - Bamboo poles can be used to make A-frames or X-frames which you can then place cross beams made of further bamboo poles upon, at varying intervals. These are great for growing crops like tomatoes and cucumbers, and have a really natural look to them to boot.
- If you’ve got an old step ladder lying around, give it a lick of paint, add some cross pieces in whatever pattern you like, and ta-dah! An (almost) ready-made garden trellis, and you’ll be recycling too so you can give yourself a pat on the back.
As you can see, the possibilities are endless and this article will be never ending if I keep trying to write about every type of garden trellis you can make for very little money, so I’m going to finish it here.
We hope that you’ve found this article helpful, and also maybe just a little entertaining, and we would like to invite you to explore our wonderful site further where you’ll find helpful tips, how to articles, product reviews, and much, much more, for your browsing pleasure.
