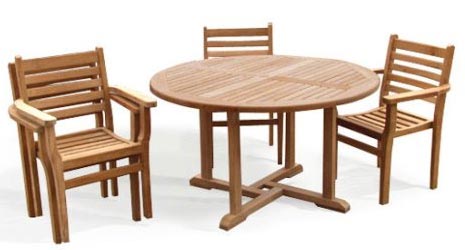
With the UK currently having temperatures that you usually see in the tropics, there’s never been a better time to invite neighbours, friends, or family around for a few drinks, dinner, or just a good old BBQ. But, if you’re having people round, you’re going to need a great garden table, so you’ve got a decision to make: Do you buy a new one from the local garden centre, or do you build your own?
Obviously, the easiest thing to do is to buy one. However, even then, unless you pay quite a bit for your garden table there’ll still be some assembly required, and the cheapest tables usually require a fair bit of it. With this in mind, you might as well have a go at building your own. I know it might seem like a daunting task for someone new to DIY, but armed with our step by step guide, right here on this page, we are positive that you will be able to create something to be proud of.
This particular design is fairly straightforward and simple, but the end result is something wonderful and eye-catching, combining both rustic and modern in a way that is very pleasing, and giving you a garden table that will fit in anywhere.
Here’s what you’ll need to make this garden table:

Tools
- Drill
- Screwdriver
- Circular saw (only needed if cutting own timber to size)
- Bandsaw or jigsaw
- Steel square (carpenters square)
- Pocket hole jig
- Tape measure
- Clamps
- Spirit level
- Something for marking wood such as a pencil or pen
- Safety clothing such as goggles, gloves, and ear protectors
Materials
- Wood glue
- 2 ½ inch wood screws
- 2 ½ inch pocket screws
- Tabletop fasteners
Timber
- 2×6 @ 62 inches (7 pieces) for making the tabletop
- 2×6 @ 39 inches (2 pieces) for making the tabletop support
- 2×6 @ 16 inches (1 piece) also for the tabletop support
- 2×6 @ 27 inches (8 pieces) for making the legs and top rails
- 2×6 @ 25 ½ inches (4 pieces) for the leg supports
- 2×6 @ 21 inches (2 pieces) also for leg supports
How to make garden table – making the legs
If you’ve decided to buy your timber in long beams and then cut them down yourself, then that’s what you’ll need to do first. Grab your tape measure, pencil, and circular saw and cut all the pieces according to the cutting list above.
On the other hand, if you bought the wood pre-cut for you (the easiest way) you are now ready to start constructing the legs of your garden table.

Now, the legs we will be making are not your usual four pieces of wood style legs that you may immediately think of when hearing the term. No, instead for this table, to give it a more modern feel, we are going to build two rectangular shaped frames made up of multiple pieces, to make them strong and solid, then fix the table top onto them. Trust us, it’ll look amazing when finished.
To connect the leg pieces together so that they are as strong as possible, we are going to use a simple joint, similar to a box joint, but consisting of only one notch on each end of the wood.
Here’s how to create the notch: Take a 27” long piece of timber and your tape measure and make a mark with your pencil 1 ¾” from the side on one of the edges. Now do the same from the other side and you should have two marks that are 2 inches apart, in the centre of the top edge of the piece of timber.
Measure 1 ½” in from these two marks and make two more with your pencil. If you now draw straight lines to join these pencil marks, you will end up with a 2”x 1.5” rectangle that you can then cut out with a jigsaw or bandsaw to make the notch we need.
If you feel satisfied that you have done this part correctly, follow the same process for the opposite end of the piece of timber, and then do the exact same thing with another 27” piece. These will be the bottom rails for your garden table legs.
So, now we have our bottom rails with their notches. Up next is to cut the legs with a ‘tooth’ so that they fit into these notches when connected at a right angle.
Take another two pieces of 27” long 2×6 and again measure 1 ¾” from each outer side and make the same marks as before. Now measure 1.5 inches in from the top edge again just like we did with the bottom rails, but this time make another mark on each outer edge, 1.5” from the top. If you join these lines together you will end up with two 1 ¾” x 1.5” almost square shapes marked out with a 2 inch gap between them, and this is your cutting template for making the ‘tooth’.
These leg pieces need to be cut in the opposite way to the bottom rail notches so that they fit together, so cut out the two 1 ¾” x 1.5” shapes leaving the 2” x 1.5” tooth in the centre.
With these leg pieces, you need only make the joint cut or ‘tooth’ at one end and leave the other as a flat edge.
Fit the legs into the bottom rails using the joint you just made so that they sit at right angles, and then use the pocket hole jig to drill holes in the bottom of the legs , approximately 1.5” deep. Once you’ve done this grab your wood glue, and some of your pocket screws and use them to attach the legs to the bottom rails.
You should now have two U-shaped frames consisting of two vertical legs attached to a bottom rail.
How to make garden table – adding support to the legs
If you’ve already cut your timber to the sizes we suggested, this next pat shouldn’t take too long at all, and is really simple.
You are now going to add some extra support for the leg frames you just put together. For this you’ll need the four 25.5-inch pieces of 2×6, and the two 21-inch pieces.
First, line the 25.5-inch planks up vertically with the inside of the legs. Once you’ve made sure everything is level, flush, and square, drill pocket holes using the jig, and then fix them in place like before using the pocket screws and wood glue.
Now you just need to lay the 21 inch pieces of timber on top f the bottom rails, between the legs in each U-frame, and screw and glue them in the same way.
The last part of building the legs, is to attach the top piece and turn these U-frames into rectangles. To do this, all that’s required is to line up another 27-inch length of 2×6 across the tops of each U-frame, use the pocket hole jig, and drill and fix the planks in place.
How to make garden table – making the tabletop support and connecting the legs.
To connect the legs, we are going to make a H-shaped frame to attach between them. This will also act as the support for the table top which we will make last.
This H-shaped frame will made up of the two 39” pieces of 2×6, and the one 16” piece you cut (or got cut) earlier.
Place the two longer pieces on the floor, or workbench so that they are parallel to each other, then place the smaller piece of timber between them perpendicular, and in the centre, to make the H-shape.
If done correctly, there will be 16 ¾” on either side of this centre piece if you measure to the ends of the longer planks, and this s how you know it will be accurately lined up in the centre.
As always, check everything is level, flush, and square where it needs to be before drilling pocket holes and connecting everything.
Use this frame to connect the tops of the legs you made earlier, and you’ll now be looking at something that resembles a table but just needs a tabletop. So let’s make one.
How to make garden table- constructing and attaching the table top
Making the tabletop is a simple affair, and just needs you to place the seven 62-inch pieces of timber side by side, make sure that there aren’t any big gaps between them, and fix them together using wood glue all along the long edges. You should use the clamps to make sure everything stays together until the glue dries.
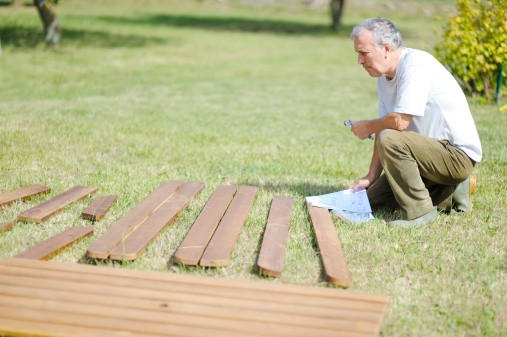
If there are gaps between the planks that you feel are too big, you can cut some more pieces that fit together properly. Large gaps between pieces that are held together by edge glue joints are not what you want for strength.
Once your table top is complete, laying down and measure 6 inches down the longer sides from each end, and 5 ¾” in from there, and make a pencil mark. You should now have four marks on which to line up the tabletop with the base correctly.
When everything is centered, simply use the tabletop fasteners to fix everything together and your table is done.
All’s left to do is the sand everything smooth and then either paint or stain your garden table to give it the finish you desire, let it dry, and invite people around to marvel at your handywork.
Finishing options
The three main options you have when it comes to adding a nice finish to your garden table are to paint it, apply a clear finish, or stain it.
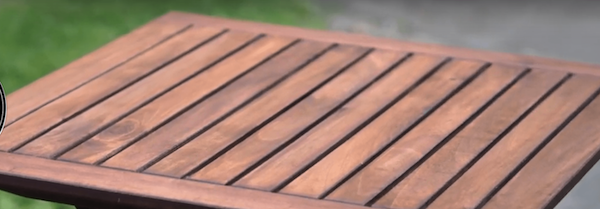
Painting is best for people who love a bit of colour in their life, and often tables are painted multiple colours with the legs and tops getting a different shade or colour entirely. Then again, picking a single, simple colour such as white, can give you a traditional feel.
Clear sealers will keep that natural look of the wood, but will provide it with protection and give your garden table a longer life.
These sealers come in two forms; water or oil based, with the oil based ones giving you the most durable finish and long lasting protection, even if they do tend to smell quite strongly.
Using a stain is sort of choosing to be somewhere between painting and clear sealing. It will still give you more colour, and great protection, but it won’t be as vibrant as a paint finish and this suits a lot of pope’s tastes.
Again, using an oil-based stain as opposed to a water based one will give you better results.
Well, that’s all for today folks. You now know how to make your very own garden table, and also what your finishing options are.
As always, we strived to deliver an informative and entertaining article here, and hope you enjoyed it.
Article you might like:
-
How to Build Garden Steps with Sleepers
-
How to Build a Garden Bar
-
How to Replace a Garden Fence Post
-
How to Make Raised Planters
Please spend time to explore the sight and visit our pages that are full of reviews for products, and articles on all things garden related. You will find plenty of how to DIY projects, and our tests of , and opinions on, the latest gardening tools and products.
