Table of Contents
Benefits of fitting a wall mounted hose reel
Have you ever opened the back door to find your regular hose pipe crumpled in a heap over the decking or worse, the lawn? It doesn’t matter if it was the kids or the dog, the result the same. An annoying start to the day in the garden. So since the development of the wall mounted hose reel, things have been looking good for us gardeners. Helping us keep things neat and tidy, just the way we like it. Not just that either, like me, have you ever put off the watering because you couldn’t be bothered to get the hose out? This becomes a thing of the past :). Trust me, from personal experience, watering the garden has gone from a chore to one of my favourite tasks.
Which one to choose though. There are so many comparable or similar products such as the automatic garden hose reels which are probably a step up from your bog standard. This is what I bought and never looked back. I decided on the Gardena automatic hose reel. Why is this you ask? I am going to admit it. I chose it based on it’s beautiful colour :). The reviews were superb for both brands including Hozelock and Gardena so it came down to aesthetics for me. Here’s a look at it:
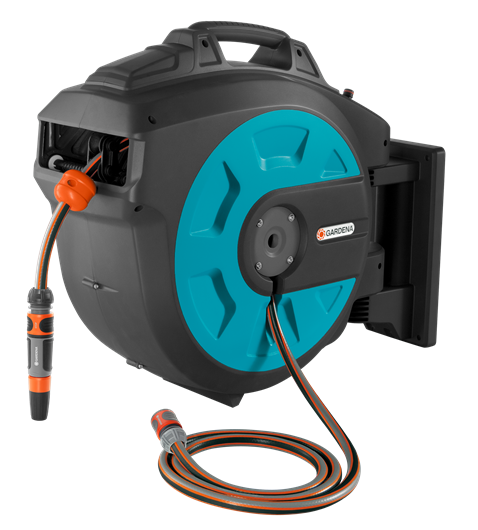
These are of course also wall mounted, they just operate with a tug forward and this generally sends them spiralling back in their compartment, very similar in action to an automatic retractable power cable on your hoover for example. Absolutely game changing is the only way to describe these advancements. Firstly, it protects the hose itself, and secondly as it winds back in, it’ll also help take the kinks out. They all have a few pitfalls though and it’s worth discussing them.
You can also get a version that hand cracks back. Some like this because generally it’s understood they’ll last longer. Many opt for the Hozelock 2 in 1 hose reel because it gives more than one option and the hand crank retraction of the hose feels robust and is well known to last. These aren’t the cheapest things in the world so piece of mind that at least some durability against time with fair wear and tear makes the purchase that much more comfortable.
How easy is it to install a wall mounted hose reel?
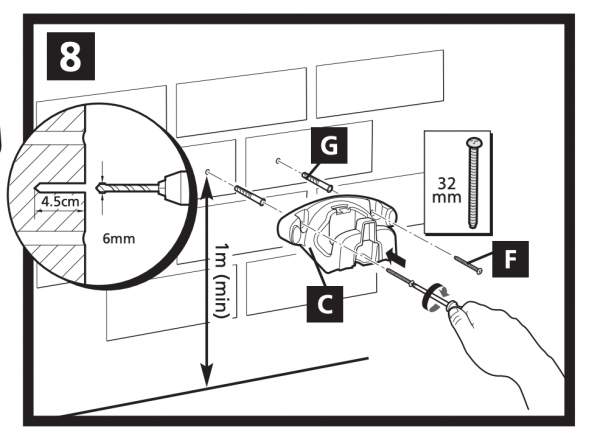
As with all hosepipe, they get pretty heavy, especially the bigger reels that are 35m in length or more. You need to be competent with a drill and wall plugs to mount this really solidly. Generally, the section that attaches to the wall is removable from the main reel itself. The first step is to mark on the wall and drill the holes deep enough that you can insert the wall plugs snug and tight.
Don’t worry, each reel comes with easy assembly instructions. For example, as we discussed earlier, if you chose the Hozelock 2 in 1 wall mountable option then you simply need to drill the holes as you’ll clearly see on the instructions with a 6mm drill bit. Make sure to go about 45mm deep or so. Before we get into it, here’s a look at the reel installed.
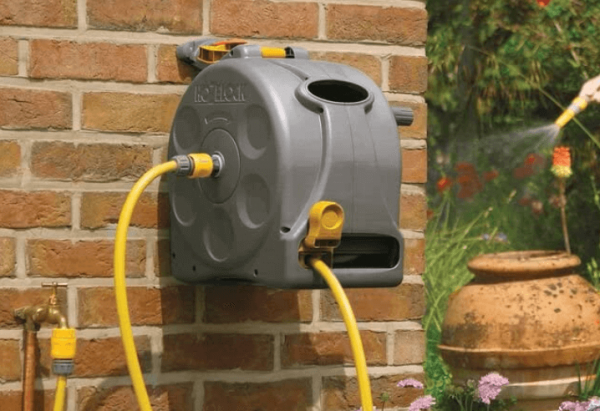
The easiest way to drill would be mark 45mm on your drill bit with a piece of tape. I must warn you at this point. You will need a masonry bit and a hammer drill is favourable though not a requirement. With no hammer function you will be left drilling for a fair bit of time and no doubt the masonry bit will heat up and be thrown away after this single use. Here is a good place to start looking for a cordless drill if you need. The best one on that page would be the DeWalt as it has the vital hammer function. If you need the drill bit here is a link.
Beyond that, I am pretty sure most homes will have a pozidrive screwdriver laying about to install the screws. Below is a picture that indicates this so very clearly from Hozelock themselves:
As you can see, there’s literally nothing to it. The most important thing to remember is that you measure into the middle of the brick as much as possible. This will stop your brick breaking and also, if you install into the mortar, it’ll pull out too easily. If you look at the Hozelock diagram which I copied from their manual, you’ll notice they install into two bricks, as centrally as possible to minimise the likelihood of damage to brick. That easy, honestly!
Just remember you are installing this to last a lifetime hopefully. You absolutely must make sure the screws are well anchored and following my guide here will help you enjoy stress free use. You will be tugging at the reel, kids will kick it at some stage, etc etc. It’s going to get some abuse so giving it the best start possible is of utmost importance.
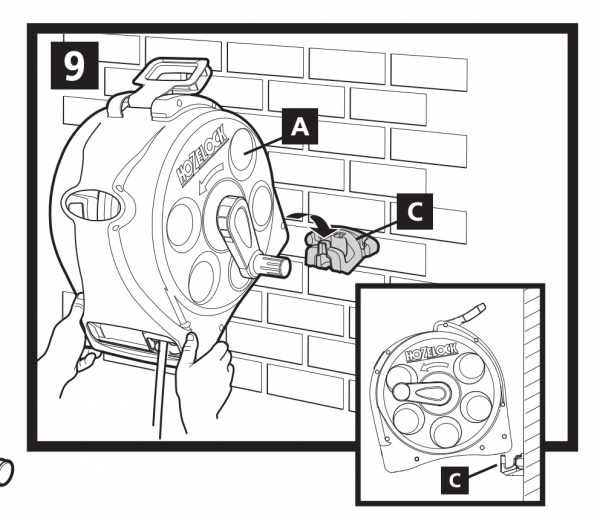
Once you have the holder mounted it’s a simple case of lifting it on and off. You’ll notice I gave the example of a 2 in 1 that can be used on the floor too. I wanted you to see just how versatile these reels can be. If you look at the picture below, again from the hozelock manual, it’s clear to see just how easily this can be removed and reattached once the holder is correctly mounted.
What if it’s not long enough to get all the way round the garden?
Many people choose to extend with an expandable hose. You’ll also want to look at some quality metal hose connectors. This is a great way of keeping the 35m or so of hose reel totally organised with an extension hose further down the garden. This is a great way of decluttering the garden. Nothing is more annoying than looking down the garden with hose all over it!
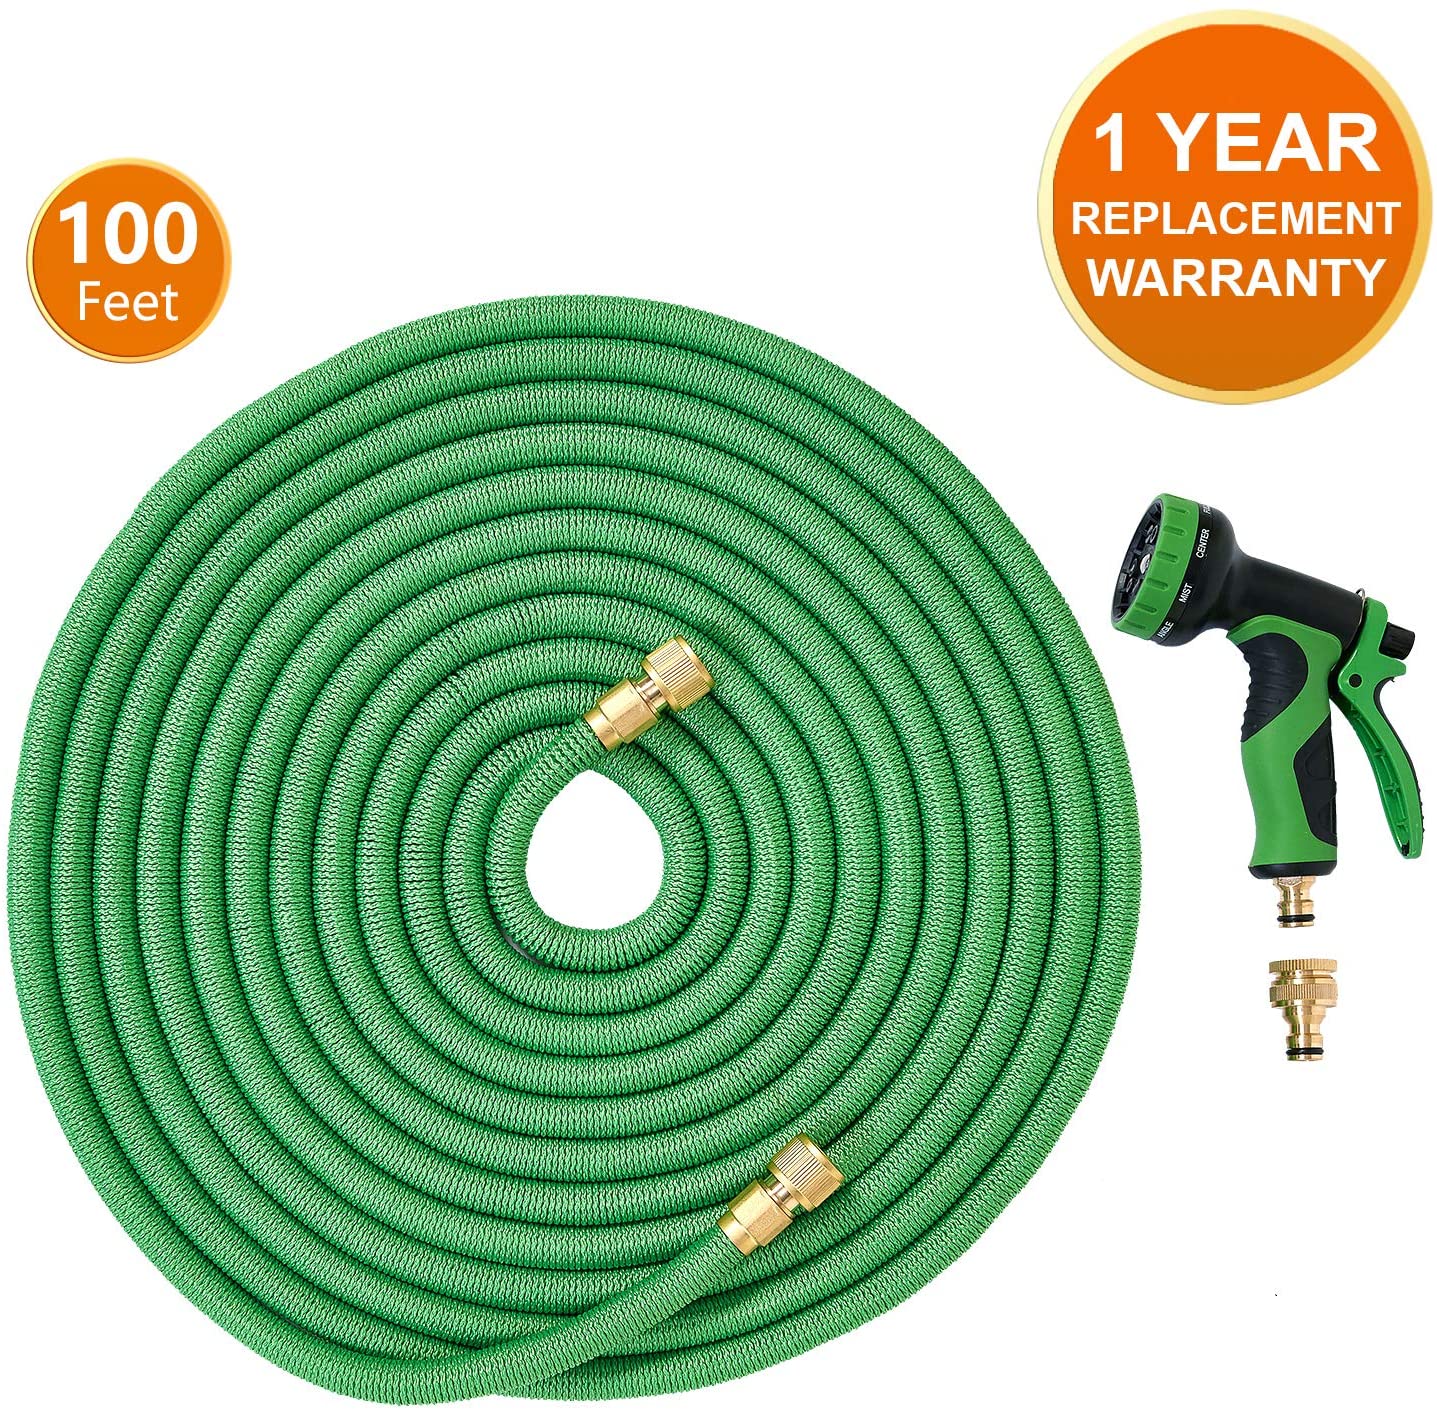
I actually went another route. I bought an additional hose reel and simply connected them together to keep my garden even neater. Whilst additional expense, I feel I spend most of my time in the garden and any gadget I can lay my hands on always keeps me happy. Like a child in the sweet shop you might say. Plus it really has made watering an absolute pleasure. Not something most of us can say trundling to the back of the garden with a watering can at some stage in our gardening lives. I suppose I should look at the positives of exercise!
What else would make watering my garden easier?
Without question you’ll want a quality sprinkler or spray gun. If you bought an expandable hose then no need for this as it was included. If not, here’s where I would start for a spray gun or nozzle. If you buy a good one you’ll be able to leave the water on without leaks while pottering around the garden. I would always recommend shutting the water down at night though for obvious reasons!
That’s about it really, once you have the hose reel mounted life will become that much easier. I can’t stress enough how excellent value for money these are and the positive impact it’ll have on your garden maintenance. I hope this post simplified the process and if you have any questions always feel free to drop me an email!