Written by Terry Smith
Our site is reader supported so when you click a link to Amazon we may earn an affiliate commission.
Best shed roof sealants: how to seal a leaky shed roof?
Oh yes, nothing more annoying than this UK Winter weather. It’s been rain, driving rain, snow, followed by more rain so now you’re looking for the best shed roof sealants to solve this annoying problem!
What it highlighted to me was the simple truth my lovely shed roof is not impervious to the weather anymore! At ten years old it’s starting to show signs of its age and I’ve experienced my first leaky shed roof problems. I gave my shed roof a good clean up right at the start of the year and that was really really cold on top of the shed roof with my trusty petrol pressure washer. I’m sure you’l get a good kick reading that :). However I am now reaping the rewards as I am in a prime position to do something about my leaky roof now that we have had the first proper break in the weather.
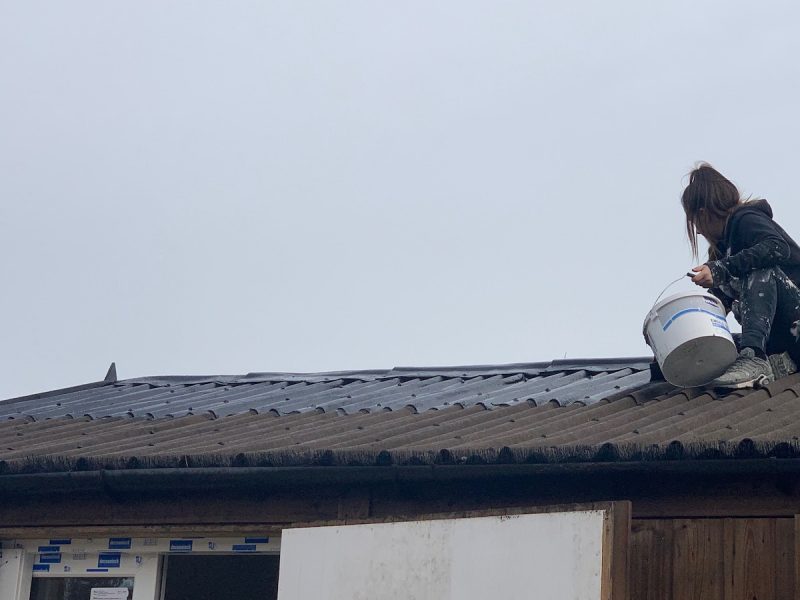
So here’s how we go about fixing a leaky shed roof made of felt or bitumen sheets with the best she roof sealant
Table of Contents
Comparison table: Best shed roof sealants: how to seal a leaky shed roof? | ||||||
|---|---|---|---|---|---|---|
| Product | What We Think | Price | ||||
| ||||||
All Weather Roofing Compound Bitumen Waterproof ROOF Coating     |
| |||||
| ||||||
    |
| |||||
    |
| |||||
Clean your shed roof – the best options
Firstly move or cover anything in the shed you don’t want to get wet. We are about to clean it and that’ll help us identify the leaks as well.
Goes without saying cleaning is your first port of call. Do not trap all that moss or algae under a layer of bitumen paint. That would be a poor way to look after your property. Instead, get up with a step ladder and clean your shed roof. Side note: worth cleaning the gutter while you’re up there too. There’s two ways to go about this really. The first is a hose and broom with a moss and algae killer. You can also use a window cleaning pole an and brush set too if you have one. My preferred method is with a powerful petrol pressure washer 😀 and here’s how to go about cleaning your shed roof in case you missed the first link.
Identify where your leaks are coming from
With that much water on the roof have a check and find out where the leaks are coming from. Don’t bother patching up the inside, we want to find the problem from outside so it never reaches that far. Now with bitumen sheets you can bet your last two pennies it’ll be from the screws and caps (where the installer holed the roof or around the joint between the hole and screw cap) that hold the sheets down or the ridge tiles – almost every single time.
On felt roofs over course it’s always the creases that cracks open. These can be tricky as water has a not so handy knack of running from its entry point to disguise itself. The best thing to do on felt roofs with leaks it to get up and try to lift the joints to see which one/s have actually failed. Sometimes it’s glaringly obvious, in the example of my shed roof here I couldn’t find the leak so I decided to tear the whole thing! It had to be one of the creases in my mind but I just couldn’t find the point. I had my suspicion the water was running a long way inside to trick me into looking for the leak in the wrong place outside. So I honestly scrutinised the whole roof but found nothing! Hopefully your entry point will be a tad more obvious. So for that reason I painted the whole shed roof in bitumen paint (more on that later).
Use a sealant to seal the holes and breaks first
What you want (whether you’ll want to pay for it is another matter) is a superb strength sealant called Sikaflex sealant. This is unbelievable at sealing water leaks, so much so, it’s real use is for boats in commercial marine repairs. Needless to say it’s superb and a lifetime repair for our little shed roofs. If you don’t want to payout for a forever repair then you could get away with a roof and gutter sealant from Everbuild. This will still last well and costs a fraction of the money. I don’t fancy doing this again for another ten years so I am going to use the right sealant and then paint on the best shed roof sealant too.
You’ll want a standard caulk / silicone gun for the application. Be mindful that if you choose the 380ml cartridge you’ll need the bigger gun but the sealants I’ve linked to are for the smaller gun meaning you can’t go wrong with whatever sealant gun you buy. Don’t bother with anything fancy, a £3 gun will do just fine if you don’t use one often, Wilkos, Wickes, and any DIY store can get you over the line. They are super handy to have around, sealing anything you can imagine from window sills to shower trays so it’s not a wasted one time purchase.
Once the sealant sets you are ready for the bitumen roof sealant.
Pick the best shed roof sealant
Without question in my mind Black Jack has been around so long and has been so effective I just can’t steer away from it. However, if you’ve got big roofs you might be looking for better value (you can get much cheaper that is still effective). So let’s take a look at the best shed roof sealants:
1. Everbuild Black Jack 901 Black Bitumen
My absolute favourite. I used four pots on this shed roof. That cost me a tidy sum and I could have cut the cost in half. Why didn’t I go for cheaper? Quit simply for the £40 I would have saved, I would be forever worrying about the longevity of my repair. Whilst the other sealants in this review work, I have personal experience with Black Jack from Everbuild being effective as much as ten years after application! Needless to say that kind of quality product deserves customer loyalty even when the sworded topic of coin is introduced 😀 Also, they make superb patio sealer, decking treatment that would also work to remove the algae on your shed roof, and wood preservatives if your shed leak has started to rot any timber. Basically a complete solution to your shed maintenance going forward so worth knowing.
Application of Black Jack roof sealant is in short a real pig. It’s thick, gloopy, nasty stuff that needs to be laid on nice and thick with a four or five inch brush.
This is nasty in a great way! 🙂 So don’t take this as a drawback, this is what makes it so incredible at waterproofing. It is literally like having a layer of tar on your roof. It’s incredible at its job: keeping water out! It does it instantly too. If you lay it on and rain comes, not a problem.
Make sure you brush own and remove any debris as you go, even if you’ve just cleaned the roof it pays to have a brush to sweep off in hand.
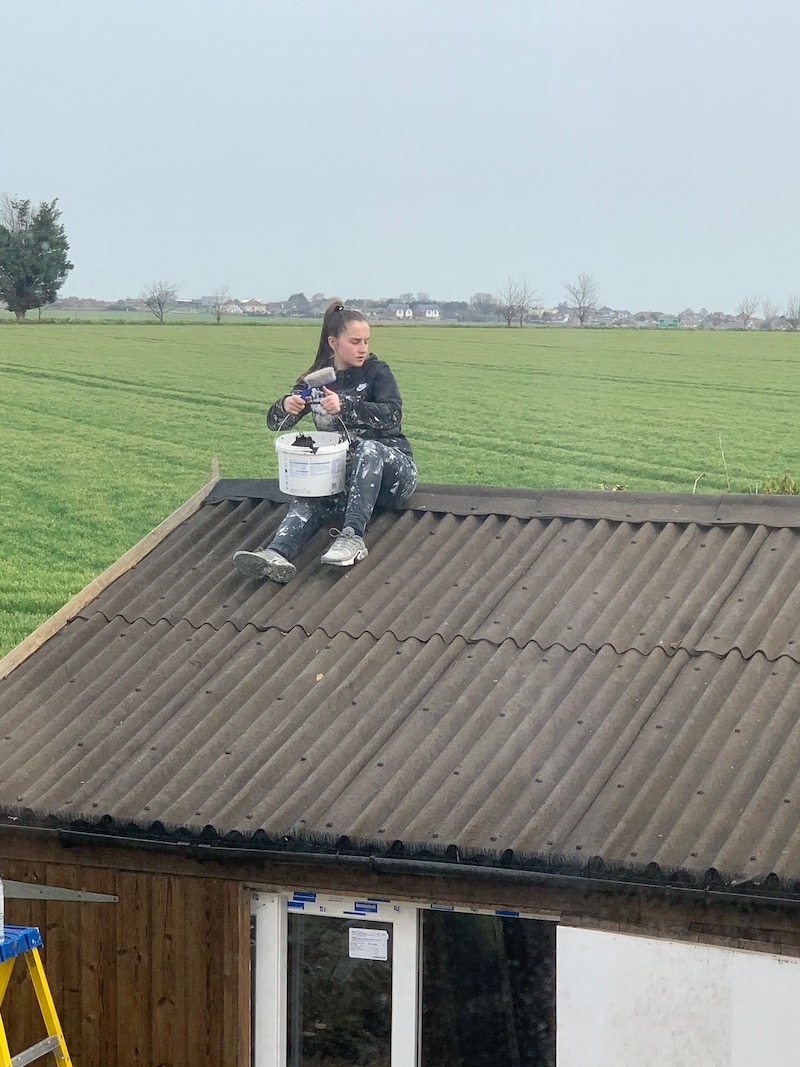
Always work along the roof then down, rather than just down, then across. This way you ensure you keep any muck from moving out of the bitumen paint. Here’s an example of that in case it’s confusing:
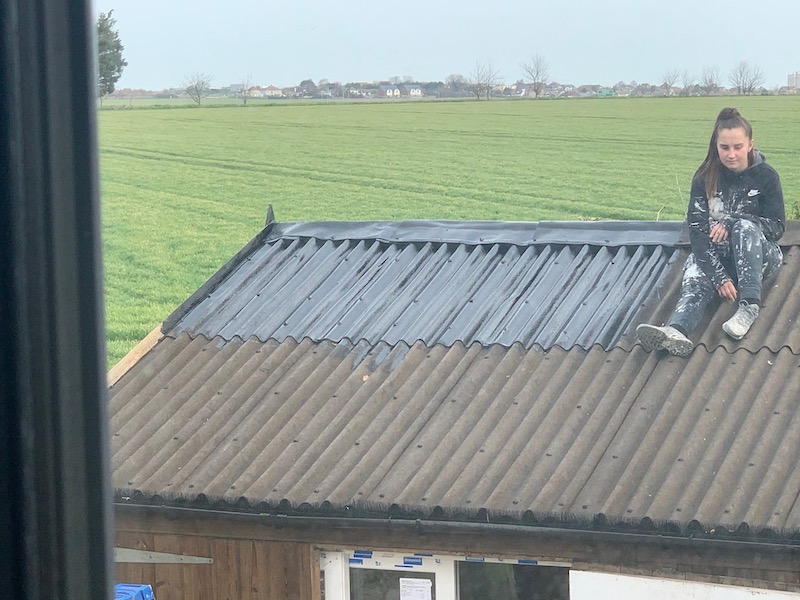
So then when you get to the end you just come back the other way, brushing any debris out off the roof. Be careful to keep this all out of your gutter. My gutter really needed a cleaning at the same time as the roof as I washed a load of debris into it. I found an incredible solution to not cleaning the gutter again for a long time funnily enough called a gutter guard.
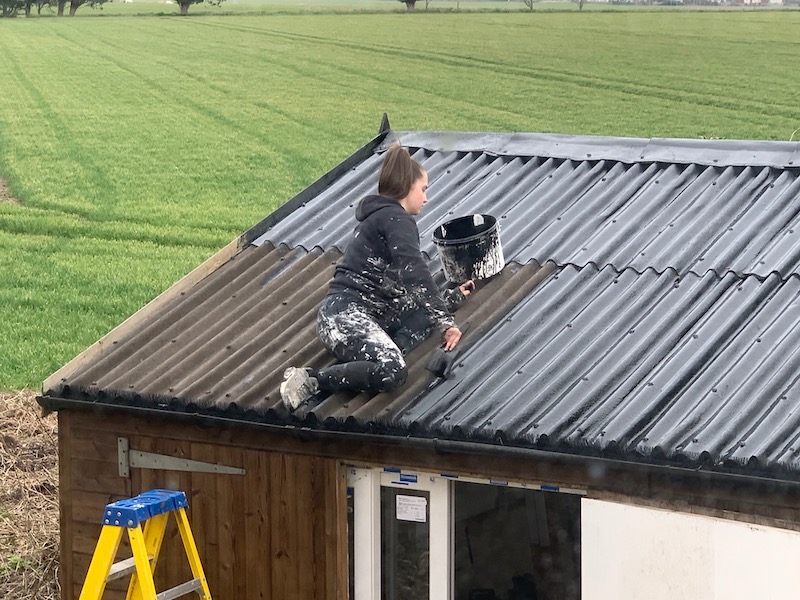
Well worth the fifty quid it cost me to do both sides of the shed! That is why you can see my assistant doing it and not me 😀 She literally covered herself head to toe. Now I highly recommend being a bit more sensible. I’m not talking about health and safety either, she’s fine up there. That shed is lined with insulation and 18mm OSB inside as part of a shed to office conversion I did. Wear non slip shoes and some comfortable jogging bottoms. Obviously if you don’t feel safe, don’t do it and here’s the UK gov health and safety advice for working on roofs.
Firstly wear decent gloves and clothes you don’t mind getting dirty. This stuff is practically impossible to get out of clothing, it’s a tough enough job getting it off your skin so don’t let it contact. Don’t say I didn’t tell you so! Don’t bother trying to roll it either. Honestly it will not lay on thick enough – you’ll end up with two coats minimum and it’ll wreck the paint roller for each application.
It’s a slow old job painting a roof of this size in bitumen paint. Like I say, each side of the roof ate 10 litres of Black Jack, I advised her I wanted it on really thick. As you can see it’s a vibrant wet colour at first. After a few days the wet look calms down a bit and it looks like a nearly new bitumen sheet roof. It takes about a day to cure fully. Try to plan this away from the rain but don’t worry if you get caught out. Honestly once it’s on. It’s so thick rain won’t even come close to ruining it (going back to how it can barely be scrubbed out of skin this is pretty obvious). Here’s a look at the colour a few days after:
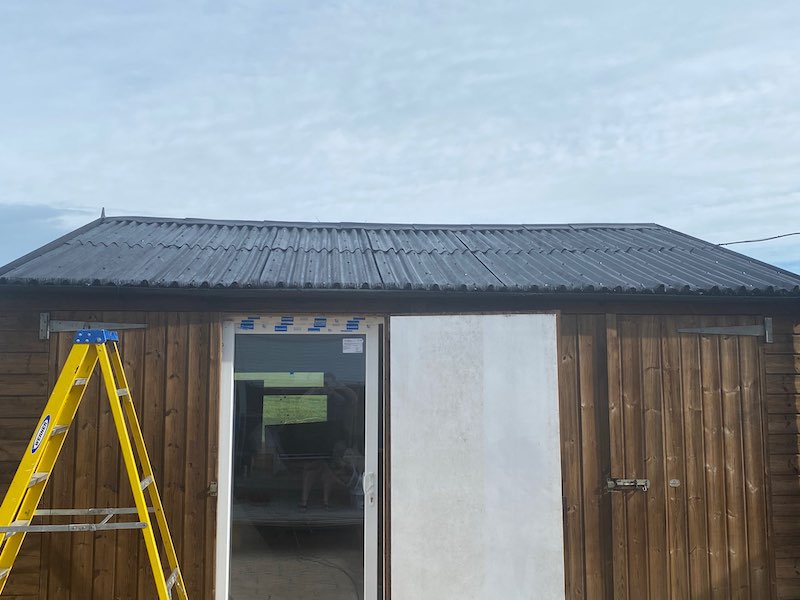
If I have any drawbacks to add it would be that the coverage is nothing like what is recommended to get the level of finish I have achieved here. In the picture ten litres was used. The roof is 17.87m2 so it’s nowhere near the 5m2 claimed, or I went overkill? Either way, that’s how much I used to feel confident and the roof is now totally sorted. I’m not saying the manufacturer is wrong, I’m saying once you go to the lengths of fixing your roof for a long time (hopefully), you don’t want to skimp on a few quid of bitumen paint. This is just a shed too, if you have a flat roof in the home paying out a few extra quid for the right roof sealant is beyond a no brainer.
All in all, Black Jack is the best shed roof sealant, and probably the best sealant for felt roofs in general in the UK – certainly that’s my experienced and tested opinion of more than 20 years.
2. All Weather Roofing Compound Bitumen Waterproof ROOF Coating
If you got past my top pick then I can only assume you’re looking for a bit better value for money. The All Weather Roofing Compound Bitumen Waterproof ROOF Coating 25 Litre roof sealant works out about half the price. This is a pretty good product for the money. You’ll get pretty good coverage pound for pound too. It’s stated you’ll get about 2m2 per litre which is approximately half Black Jack. With that being said you may not think you need a second coat so then in which case it is genuinely half the price. However, Black Jack didn’t go as far as I’d like on corrugated sheets so I still feel this is way cheaper.
It’s fibre reinforced which helps bond over larger cracks and holes. Needless to say, if the holes are too big (or cracks) refer to using the Sikaflex first before coating over.
If you look online you’ll see some reports that this doesn’t work and breaks down quickly. In my opinion this is down to preparation more than the quality of the product. You’ll even find people complaining about Black Jack which has been saving roofs for a lifetime! Always make sure you clean down your roof thoroughly and then ensure it’s bone dry on application for maximum adhesion.
3. Aquashield Black Acrylic Instant Waterproof Roof Repair Coating Sealant, One Coat Emergency Leak Seal Paint for All Roof Types
Aquashield Black Acrylic Instant Waterproof Roof Repair Coating Sealant, One Coat Emergency Leak Seal Paint for All Roof Types
Another great solution for flat roofs is the Aquashield Black Acrylic Instant Waterproof Roof Repair Coating Sealant. This stuff is seriously thick and gloopy. I reckon you’ll apply about 1 litre per metre square but you can be sure it’ll do the job. It’s almost like painting on another roof. It’s that thick! Don’t even dream of saving the brush either, just like Black Jack it doesn’t clean up easily at all and it’s instantly weather proof on application.
Many have this product down as so good, it is their last resort. I’m not sure I entirely agree with that based on testing but it certainly is superb.
I would have it down as more dark grey than black but I’m not sure the colour is the biggest issue, not when it’s so effective. March onward till Sept is the right time to be having a go at this really. You want temperatures between 5 to about 25 degrees ideally as that’s the sealants best range for setting.
It’s quite fibrous so fills gaps and cracks well. If they are too big then you need a sealant gun before applying a coat of this roof sealant. It’s a fantastic product, you can literally use it on all surfaces but to be sure:
- Flat roofs
- Pitched roofs
- Weathered asphalt
- Bituminous surfaces
- Gutters
- Concrete
- Brickwork
- GRP & Fibreglass
- Felt & metal
- Hard/strong plastic
You should realistically get five years out of this roof sealant if you did the right prep work and cleaned up your surfaces nicely. I would highly recommend that too as this isn’t cheap so the longer it lasts the better value you are getting!
All in all, a super roof sealant.
4. Cromapol Acrylic Waterproofing Coating Grey - 5Kg
Another acrylic based roof sealant. This one too is high quality and will do the job well. It’s more expensive than Black Jack but if you prefer a grey finish then you can rely on this for a leak free roof. It applies in exactly the same way as all of the other reviews – simply brush on!
In terms or texture, it finishes a nice smooth look. Be sure not to get this on your arms, just like all my top picks, they are all very very nasty in a good way 😀 You’ll notice it has fibres running through it. This is necessary to ensure it binds and sets over small cracks and creases.
You could probably get away with using a tar brush for this roof sealant. I would say it’s more or a filler than a paint. It’s so thick!
This sealant is so good I laid it on, then had to go at it with a hose the next day. You’ll soon be in my camp with this one! It takes a few hours to go kind of tacky touch dry and then it really wants a full 24 to set hard. So give me a little grace on that and make sure you go at your roof a full 24 hours later before hosing down your roof!
As always, remember it won’t fill huge voids, it’s not magical! You’ll need a sealant gun loaded with Sikaflex for that.
5. Polar Premium Black Instant Waterproof Roof Sealant Paint for Leaks 500ml, Roof Sealing Repair Coating Paint for All Roof Types and Gutters
Emergency roof sealant is what I would call the Polar Premium Black Instant Waterproof Roof Sealant. You’ll open up the tin and wonder if you needed a plastering trowel or a paint brush :D. No jokes aside use a three inch brush. This stuff works amazing but it’s expensive. Make sure you know you’re doing a patch repair job with a little tin and it’ll do you just fine.
You can lay it on in the damp no problem but as always I feel better about bonding to a dry surface. It will sort you out if you’re in a real pickle and it’s an emergency. You will lay it on and that’s the end of it. Leaks will be gone. No hype needed. As usual with all the good roof sealants there’s no way to save the brush so use one you don’t mind throwing away.
You’ll get about half a metre square out of this little tin, bear that in mind, it’s not a lot! On the plus side you don’t need a primer, just go at it. It’s probably the sealant I would use on guttering and drain pipes. It’s so thick it’ll settle on verticals as well as more horizontal material.
This will repair concrete and stone but don’t use it in your pond, this stuff is nasty in a bad way too, it’s toxic to all aquatic life. With concrete and stone oak sure there’s no loose debris and you’re back to a solid surface to ensure it bonds as well as it can. It takes a couple of days to harden off properly but touch dry long before.

