Why spend hundreds of pounds replacing a shed when you can restore more often than not. It’s only a shed roof that needs fixing after all. In this case, an ivy had grown up the shed, algae and moss had taken hold (nothing a shed wood preservative can’t handle), and in a nutshell, this shed roof hadn’t been maintained or repaired since it was installed ten years ago. There’s a few important safety tips and use of the right shed roof paint goes a long way too in this article. If you follow this guide reasonably carefully then you’ll be able to produce the same before and after pictures as in this article and let’s be honest, a faded shed roof is not attractive at all! This is one of those must do jobs (for your own sanity) when looking out of your bedroom window at the shed roof!
- Safety first when refurbishing a shed roof
- Get the ivy or shrubs growing off your shed roof
- Clean down your shed roof well using a pressure washer if you have one
- Paint your shed roof if needed
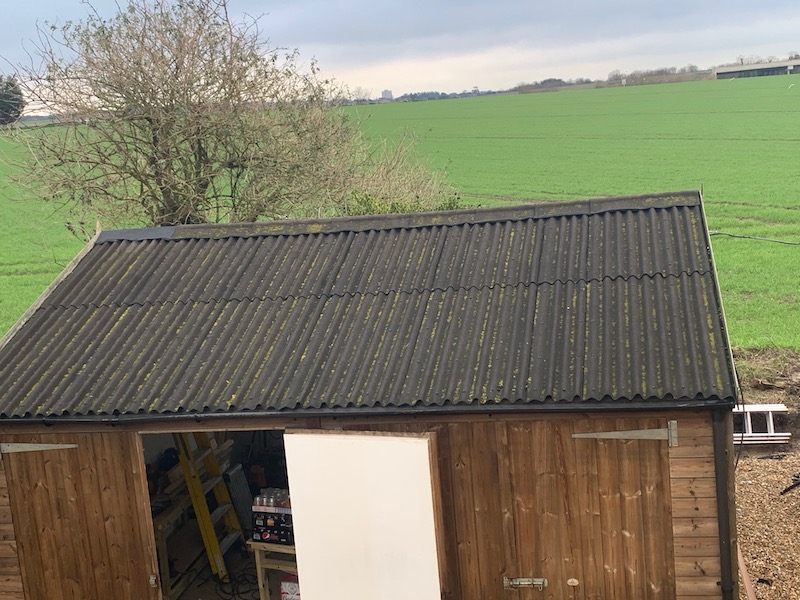
Here’s a look before we start cleaning the shed roof:

Safety first when refurbishing a shed roof
A quality set of steps, or tripod ladder is handy. Always remember to ask someone to steady the ladder of choice when climbing on and off the roof (if your shed is that big). Another crucial point to remember is that a bitumen shed roof is not structural. You cannot just stand on it. However, a super trick is to put down a board and some insulation like rock wool to protect the roof from damage and spread your weight over many joists. Don’t go spending money unnecessarily though. Any old cover will do to put down before the boards and they’ll minimise scarring and damage to the roof.
Be absolutely sure the roof is capable of holding your weight before getting on it. Use your common sense and if not certain ask a professional. For most though this a standard size shed, a tall set of steps or tripod ladder is just the ticket.
Get the ivy or shrubs growing off your shed roof
In this case there was an Ivy climbing up the back of the shed. We had to get rid of that first. Ivy is particularly difficult to deal with. If it’s still alive it binds really well. I suggest waiting 12 months when removing Ivy from roofs if you can, but sometimes we are in a rush and this is much less critical on a shed so it’s worth getting stuck in to clear the job if you are feeling strong. Unlike the Ivy climbing up the house roof in the reference, I wen’t at this Ivy while still green. Bag it up, making sure you wear gloves and protective equipment as Ivy is mildly poisonous.
Clean down your shed roof well using a pressure washer if you have one
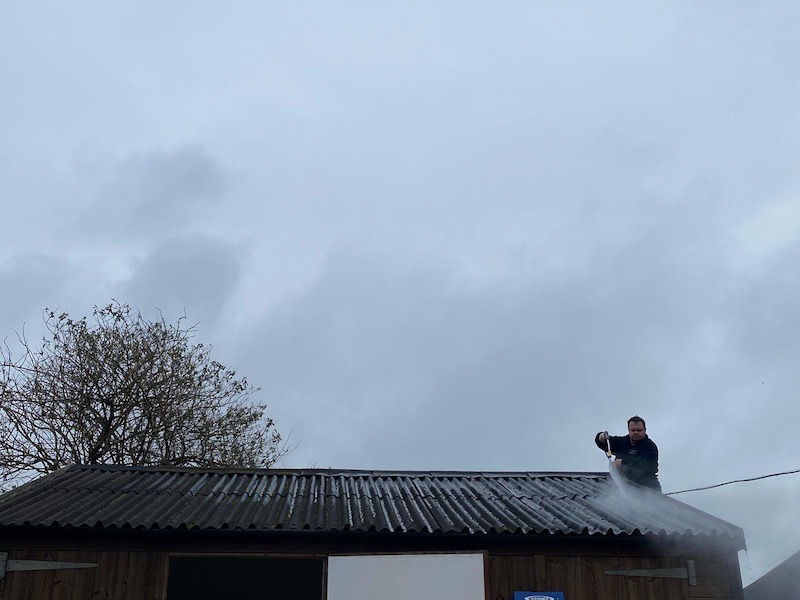
There are two ways to clean your shed roof once it’s clear of the main debris. The first is a good algae and moss killer with a stiff broom and a hosepipe. I find an expandable hose useful as it takes the weight off when working at heights. Talking of hosepipe, have you seen the automatic hose reels? Talk about making life a doddle, these wall mounted hose reels are far too easy and civilised! Anyway, back to the realities of scrubbing! There’s no magic here, you just go at it and at it until it’s clear and clean. The other method that I prefer considerably is to get out a petrol pressure washer and really have a good go at it. Warning though and handy tip, as I was using my pressure washer it almost seemed like I was pulling a layer of Bitumen too. With that said, scrubbing had a similar effect but left a furry kind of finish.
I use the Wilks 750 petrol pressure washer because in my mind when I reviewed this it was pound for pound a really great buy if you are looking for power. They’ve also proven to be reliable. Before you get too carried away though, a cautionary word of wisdom – always do a little test patch first. If you blow holes in the roof then repair will be out of the window! Select a pressure setting that cleans but doesn’t destroy 😀 ! Honestly, you’ll be shocked by the power the Wilks 750 produces (if you get one).
If you don’t fancy the cost of buying then local hire shops have quality pressure washers and it’ll sure beat the pain of doing this job by hand! I also used this pressure washer to clean down shed exterior walls. The results were superb if you’re interested in completely refurbishing the shed.

Remember, the key to all home DIY tasks is the preparation. If you get the shed roof completely cleaned up then the paint layer will look so much better too.
Paint your shed roof if needed
Bitumen roof sheets last very very well and take a lot to discolour/look unattractive. You might be surprised by how much more vibrant your roof looks after cleaning it up and may decide it doesn’t need painting. In my case I just wanted to really make it as vibrant as possible because it was in view from the main bedroom (or you have a shed stain or design to match).
Make sure the roof is bone dry and clear before applying any paint even if you’re in a rush don’t do it to yourself. You’ll be sorely disappointed with the results if you don’t give the sheets a chance to thoroughly dry out after the cleaning process. If you find yourself reading this with a felt roof it’s even more important and moisture will get between the joints and this must dry or will be trapped and can cause rot long term. The paint can bubble and peel almost within a few weeks if you try your luck. You have been warned!
My personal preference is to use a black bitumen paint to seal in the bitumen roof. Get yourself some throw away paint brushes or a paint roller. Cleaning is a nightmare.
You will find other professionals recommending the use of a primer and masonry paint as they want a different colour other than black. After all, bitumen paint colours are restrictive in choice. With this said, A bitumen roof gets quite warm on a hot Summer’s day and far more likely to crack and peel, far more quickly than bitumen paint.
I would also point to the lifespan when considering the paint choice. Whilst bitumen paint is much much harder to apply and you’ll need to roll/brush it by hand and move your boards frequently, it’ll practically last a decade and more, plus, if you consider it’s an extra layer of protection then to me the balance weighs up, especially if the plan was a black roof anyway, even if it costs more, your time is worth more than the few quid you’ll save in paint (which will turn out to be more expensive as you’ll need to paint the roof at least three times more often that bitumen paint).
With regards to application, follow the manufacturers guidelines which will say something in the region of paint between 10-30 degrees and of course make sure you pick a day which is dry. I highly recommend doing this first thing in the morning so that paint has time to cure during the day before nightfall. This gives you the best chance of avoiding rain/weather accidents! And if you want to be flash, a weather station is really quite handy to plan the job. Actually they are handy to plan all gardening jobs!
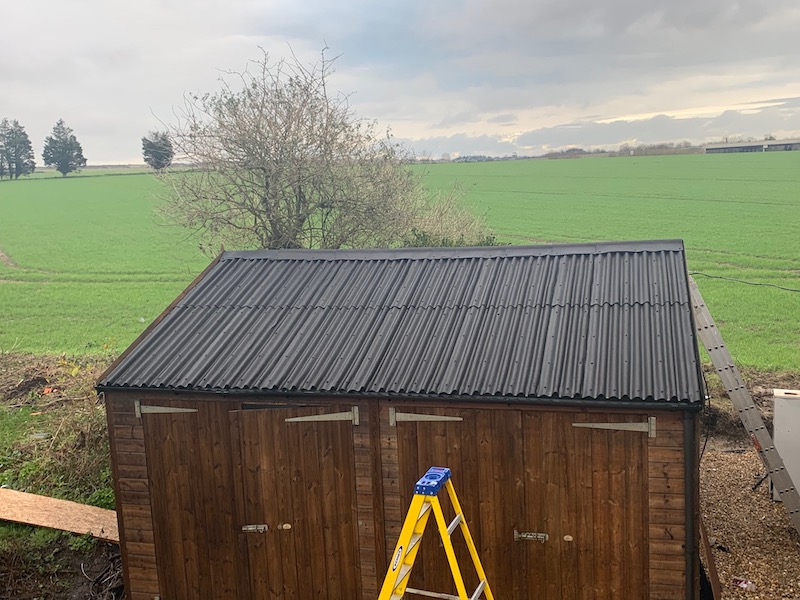
That’s it, look back and enjoy your newly refurbished shed roof. Bitumen sheets or felt can look great even if old! The next things to consider would be a quality shed alarm and a shed base to complete the shed refurbishment.
